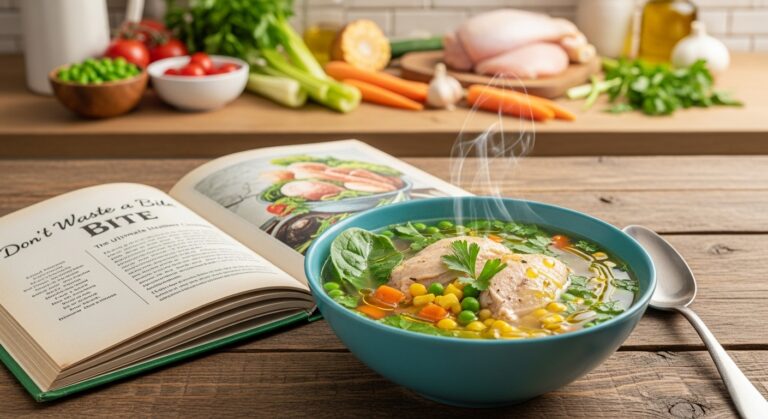

Ever wondered what the secret is to a restaurant-quality soup, a mind-blowing stew, or a gravy that people talk about for days? Spoiler alert: it’s not some fancy, expensive ingredient. It’s a foundational staple that home cooks often overlook—a perfect homemade beef broth.
Forget the weak, salty stuff in cartons. We’re talking about a rich, deeply savory, and beautifully gelatinous broth that will transform your cooking. In my experience, mastering homemade beef broth is one of the most rewarding kitchen skills you can learn. It not only elevates your dishes but also uses up bones and veggie scraps, which is a huge win for any home chef.
This guide will walk you through every step, demystifying the process so you can make liquid gold in your own kitchen.
Quick Summary: Key Takeaways
For those in a hurry, here’s the gist:
- Roast Your Bones: This is the non-negotiable step for deep color and flavor.
- Use the Right Bones: A mix of marrow bones, knuckle bones, and meaty bones (like oxtail or short ribs) gives you the best gelatin and flavor.
- Simmer, Don’t Boil: A gentle simmer is crucial for a clear, clean-tasting broth. Boiling makes it cloudy.
- Long & Slow is Key: Simmer for at least 8 hours, but 12-24 hours is where the magic really happens.
- Skim the Scum: Regularly skimming the impurities from the surface during the first hour is essential for clarity.
Why You Should Bother Making Your Own Beef Broth
I get it. In a world of instant everything, spending hours on broth might seem like a lot of effort. But trust me, the payoff is huge.
- Unbeatable Flavor: There is simply no comparison between the deep, complex flavor of homemade broth and the one-dimensional taste of store-bought versions.
- Rich in Collagen and Gelatin: A proper bone broth is packed with nutrients. When cooled, it should jiggle like jelly—that’s the gelatin, which is fantastic for gut, skin, and joint health. For more on the benefits, check out this detailed overview from Healthline on Bone Broth.
- You Control the Ingredients: No hidden MSG, excessive salt, or artificial flavors. You decide exactly what goes in.
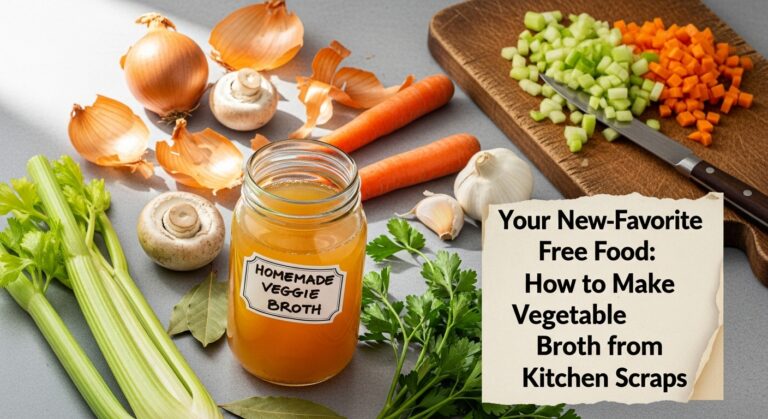
- It’s Economical: It’s a great way to use bones you might otherwise throw away. Ask your local butcher; they often sell high-quality soup bones for very cheap.
The Ingredients You’ll Need
Making a perfect homemade beef broth is more about technique than a rigid list of ingredients, but here is what I’ve found works best for a truly spectacular result.

- Beef Bones: About 2 kg (4-5 lbs). A mix is best! I use:
- Marrow bones: for richness.
- Knuckle/joint bones: for collagen (this is your gelatin source!).
- Meaty bones: like short ribs or oxtail for that deep, beefy flavor.
- Mirepoix (Aromatic Veggies):
- 2 large onions, unpeeled and quartered
- 2-3 large carrots, roughly chopped
- 2-3 celery stalks, roughly chopped
- Aromatics:
- 1 whole head of garlic, halved crosswise
- 2 bay leaves
- 5-6 whole black peppercorns
- A few sprigs of fresh parsley and thyme
- Tomato Paste: 2 tablespoons (optional, but adds color and depth).
- Apple Cider Vinegar: 2 tablespoons. This helps pull the minerals and collagen from the bones.
- Cold Water: Enough to cover everything by about 2 inches.
Step-by-Step Instructions for Perfect Beef Broth
Follow these steps closely, and you’ll be rewarded with the most amazing broth you’ve ever tasted.
Step 1: Roast the Bones and Veggies (The Flavor Step!)
Preheat your oven to 200°C (400°F).
This is my number one tip for a dark, rich broth. Don’t skip it! Place the beef bones, onions, and carrots on a large baking sheet. If you’re using it, smear the tomato paste over the bones. Roast for about 30-45 minutes, or until the bones are deeply brow
Step 2: Deglaze the Pan
Once roasted, transfer the bones and veggies to your large stockpot. You’ll see browned bits stuck to the baking sheet—that’s pure flavor! Pour about a cup of water onto the hot pan and use a wooden spoon or spatula to scrape it all up. Pour this flavorful liquid into your stockpot.
Step 3: Add Water and Simmer
Add the celery, garlic, bay leaves, peppercorns, parsley, thyme, and apple cider vinegar to the pot. Pour in enough cold water to cover everything by a good 2 inches.
Bring the pot to a boil, then immediately reduce the heat to low. You want the gentlest simmer possible—just a few bubbles breaking the surface every few seconds.
Step 4: Skim, Skim, Skim!
During the first hour of simmering, a layer of grey or brownish foam will rise to the top. This is “scum” (denatured proteins and impurities), and you want to get rid of it. Use a large spoon or skimmer to carefully remove and discard it. This is the key to a crystal-clear broth. After the first hour or so, you won’t need to do this much.
Step 5: The Long, Slow Simmer
Now for the easy part: waiting. Let your broth simmer gently, partially covered, for at least 8 hours. For a truly gelatinous and nutrient-dense broth, I recommend simmering for 12 to 24 hours. The longer it simmers, the more flavor and collagen are extracted.
If you’re nervous about leaving the stove on, a slow cooker is your best friend here. Just transfer everything to the slow cooker after skimming and let it go on low for 12-24 hours.
Step 6: Strain and Cool
Once the simmering is done, turn off the heat. Carefully remove the large bones and vegetables with tongs.
Next, strain the broth through a fine-mesh sieve to remove the smaller bits. For an extra clear broth, line the sieve with a few layers of cheesecloth. This is a pro tip that ensures absolutely no sediment makes it through.
Let the broth cool to room temperature before transferring it to the refrigerator.
Step 7: Defat the Broth
After chilling in the fridge for a few hours (or overnight), a hard layer of fat will form on the top. Simply use a spoon to scrape this off and discard it (or save it! Beef tallow is amazing for roasting potatoes).
What you have left underneath should be a beautiful, jiggly, amber-colored broth. That jiggle is the sign of success!
Suggested placement: Here, at the end of the instructions.
How to Store Your Homemade Beef Broth

Your liquid gold will last in the fridge for about 5-7 days. For longer storage, freezing is the best method.
- In Jars: Pour into freezer-safe jars, leaving at least an inch of headspace at the top to allow for expansion.
- In Bags: Use freezer-safe zip-top bags and lay them flat to save space.
- In Ice Cube Trays: This is my favorite trick! Freeze the broth in ice cube trays. Once frozen, pop the cubes out and store them in a bag. This is perfect for when you just need a little bit to deglaze a pan or add a flavor boost to a sauce.
Frequently Asked Questions
1. Why isn’t my beef broth gelling?\
This usually happens for one of two reasons: the ratio of water to bones was too high, or you didn’t use enough collagen-rich bones (like knuckle or joint bones). Not simmering long enough can also be a factor. While it will still be flavorful, you’ll miss out on that rich body. Next time, add more joint bones and reduce the water a bit.
2. Can I make this in a pressure cooker or Instant Pot?
Absolutely! The process is much faster. Roast the bones as directed, then add everything to the pressure cooker. Cook on high pressure for about 2-3 hours. While you won’t get quite the same depth of flavor as a 24-hour simmer, it’s a fantastic shortcut for a weekday broth.
3. My broth is cloudy. What did I do wrong?
Cloudiness is almost always caused by boiling the broth instead of gently simmering it. A rapid boil emulsifies the fats and impurities into the liquid, making it murky. The second most common cause is not skimming the scum effectively during the first hour. It won’t affect the taste much, but it won’t be as visually appealing.
Conclusion: Your New Kitchen Superpower
Congratulations! You now have the knowledge to make a perfect homemade beef broth that will fundamentally change the way you cook. It’s a simple process of patience that rewards you with a foundational ingredient that money just can’t buy.
Now I’d love to hear from you! What will you make first with your delicious homemade broth? Leave a comment below and share your kitchen adventures!