You’ve just finished a fantastic pork chop dinner. The plates are cleared, and all that remains is a pile of bones. For most, this is the end of the road—scraps destined for the bin. But in a recipycle.com kitchen, this is where the magic really begins.
Those bones are not trash; they are a treasure chest of flavor and nutrition just waiting to be unlocked. In my kitchen, no bone gets left behind, because I know they can be transformed into a rich, savory, and incredibly useful pork broth.
This guide will show you exactly what to do with leftover pork chop bones to create a delicious broth from scratch. It’s one of the easiest and most rewarding ways to reduce kitchen waste and add a secret weapon of flavor to your cooking arsenal.
Why You Should Never Throw Away Pork Chop Bones
Before we get to the “how,” let’s talk about the “why.” Making broth from leftover bones is a cornerstone of a zero-waste kitchen.
- It’s Practically Free: You already paid for the pork chops; the incredible flavor you extract from the bones is a free bonus.
- It’s Packed with Flavor: Homemade broth has a depth and richness that store-bought versions simply can’t match.
- It’s Nutritious: The slow simmering process extracts collagen, gelatin, and minerals from the bones. Many sources, including this overview from
Key Takeaways: Your Simple Guide to Pork Broth
- Use Cooked Bones: Yes, you can and should use the bones from your cooked pork chops! No extra prep is needed.
- Add a Splash of Vinegar: A tablespoon of apple cider vinegar helps draw minerals and collagen out of the bones into your broth.
- Low and Slow is the Way to Go: A gentle, barely-there simmer for at least 4-6 hours is the secret to a clear, flavorful broth. Do not boil!
- Aromatics are Your Friends: Simple vegetables like onions, carrots, and celery (known as a mirepoix) build the classic flavor backbone of your broth.
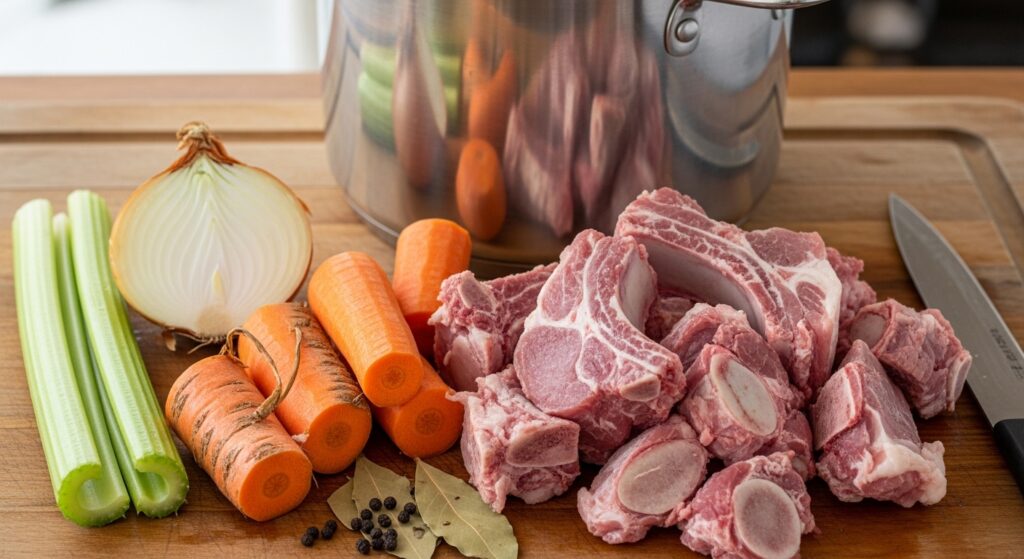
What You’ll Need: More Than Just Bones
The ingredient list is simple and flexible. Think of this as a template for using up what you have.
- Pork Chop Bones: You’ll want the bones from at least 4-6 pork chops. You can collect them in a freezer bag over time until you have enough.
- Aromatics: 1 large onion (skin on is fine), 2 carrots, and 2 celery stalks, all roughly chopped. No need to peel!
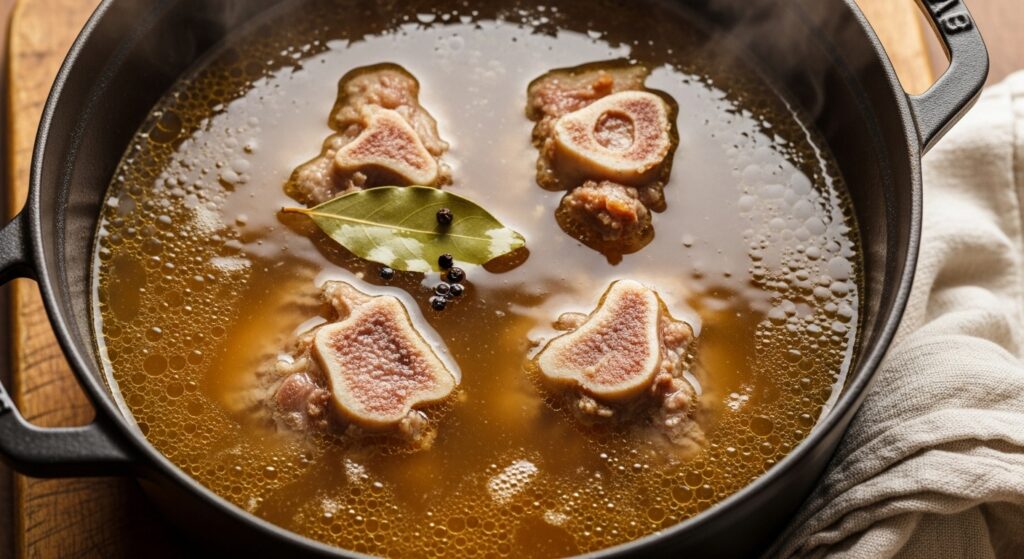
- Herbs & Spices: A few cloves of garlic, a bay leaf, and about 10 whole peppercorns.
- Apple Cider Vinegar: About 1 tablespoon.
- Water: Enough cold, filtered water to cover everything by at least 2 inches.
`
How to Make Broth from Leftover Pork Chop Bones (Step-by-Step)
This process is incredibly simple. It’s more about time than it is about technique. Follow these baby steps for perfect broth.
Step 1: Gather and Prepare Your Bones
This is the easiest step!
Simply take the bones from your dinner. It’s perfectly fine if they have a little meat or cartilage still attached—that’s just more flavor! If your bones are frozen, you can use them directly from the freezer.
A Note on Roasting: For a deeper, darker, more robust broth, you can roast the bones and vegetables on a baking sheet at 400°F (200°C) for 30 minutes until browned. However, for a lighter, cleaner-tasting broth (and for the sake of simplicity), you can skip this step entirely. In my experience, using already-cooked pork chop bones provides plenty of flavor without the need for a second roasting.
Step 2: Add to a Pot with Aromatics
- Place Bones in Pot: Put your leftover pork chop bones into a large stockpot or Dutch oven. A heavy-bottomed Cuisinart 8-Quart Stockpot is perfect for slow, even simmering.
- Add the Veggies: Add your chopped onion, carrots, celery, and garlic cloves.
- Add Spices: Toss in the bay leaf and whole peppercorns.
Step 3: Cover with Water and Add Vinegar
- Add Cold Water: Pour in enough cold water to cover all the ingredients by at least 2 inches. Starting with cold water helps to extract more flavor.
- Add Vinegar: Pour in the tablespoon of apple cider vinegar. Don’t worry, you won’t taste it in the final product!
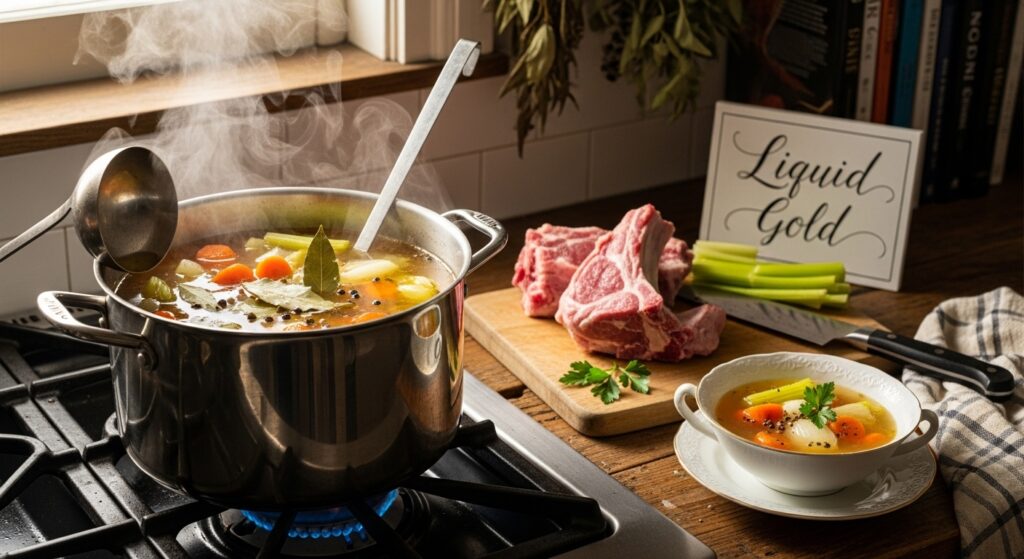
Step 4: The Low and Slow Simmer
This is the most important part of the process.
- Bring to a Simmer: Place the pot on the stove over medium-high heat and bring it just to a simmer.
- Skim the Scum: As it heats up, you may see some foamy “scum” rise to the surface. Skim this off with a spoon and discard it. This ensures a clearer, cleaner-tasting broth.
- Reduce Heat and Wait: Immediately reduce the heat to the lowest possible setting where the broth still maintains a very gentle simmer. You should only see a few tiny bubbles rising to the surface.
- Simmer for Hours: Cover the pot partially (leaving the lid slightly ajar) and let it simmer for at least 4-6 hours. You can go as long as 8-12 hours for a richer, more concentrated bone broth.
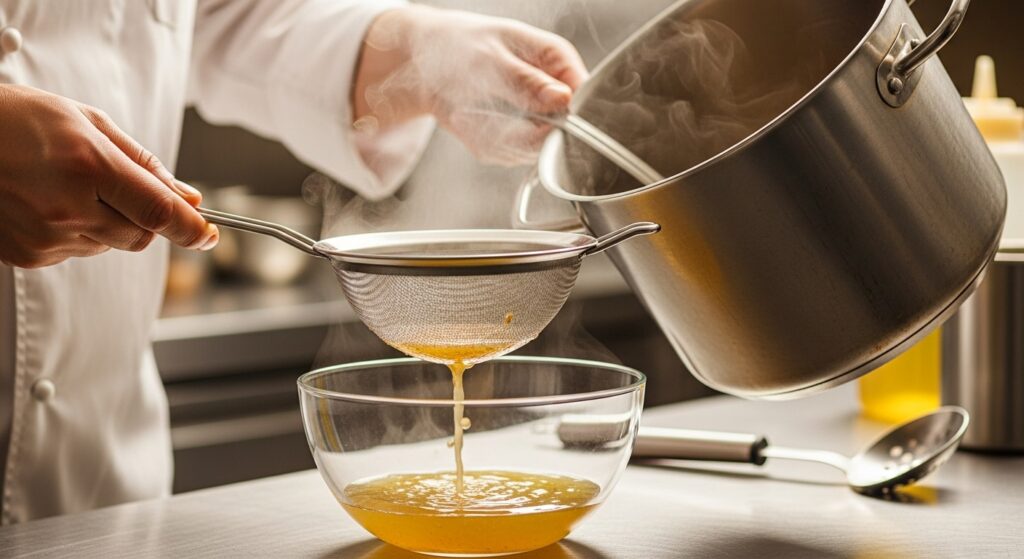
Step 5: Strain and Store Your Liquid Gold
- Cool Slightly: Turn off the heat and let the broth cool slightly for about 20-30 minutes, making it easier to handle.
- Strain Carefully: Place a fine-mesh sieve over a large bowl or another clean pot. Carefully pour the broth through the sieve to separate the liquid from the solids. For an extra-clear broth, you can line the sieve with cheesecloth. The Cuisinart Strainer Set is great because it has multiple sizes for any task.
- Discard the Solids: The bones and vegetables have given up all their flavor and can now be discarded or composted.
- Cool and Store: Let the strained broth cool to room temperature. Then, transfer it to airtight containers or glass jars and store it in the refrigerator for up to 5 days, or in the freezer for up to 6 months.
` .
5 Delicious Ways to Use Your Homemade Pork Broth
Now that you have this liquid gold, what do you do with it?
- The Ultimate Ramen Base: This is the perfect foundation for a restaurant-quality bowl of ramen or our Hearty Pork and Noodle Soup.
- Flavorful Soups and Stews: Use it as the base for any soup that calls for chicken or beef broth.
- Cook Grains: Cook rice, quinoa, or barley in your pork broth instead of water for an incredible flavor boost.
- Rich Pan Sauces: Deglaze a pan (especially after cooking Our Favorite Pan-Seared Pork Chops Recipe with a splash of this broth to create a quick and savory pan sauce.
- Sip It: Warm a mug of the seasoned broth and sip it on its own for a comforting and nutritious drink.
Conclusion: From Scraps to Staples
Making broth from leftover pork chop bones is a simple act that will fundamentally change your cooking. You’ll save money, reduce waste, and add an ingredient to your kitchen that is bursting with authentic, homemade flavor. It’s the perfect first step on a journey to a more sustainable and delicious kitchen.
For more ideas on making the most out of your ingredients, check out A Beginner’s Guide to Reducing Kitchen Waste.
Frequently Asked Questions (FAQ)
Q1: Do I need to roast the bones first if they are already cooked?
No, you don’t have to. Roasting is typically done with raw bones to develop a deep, roasted flavor. Since your pork chop bones have already been cooked, they will still yield a delicious, flavorful (though likely lighter-colored) broth without the extra step.
Q2: How long can I store leftover pork bones before making broth?
You can store them in an airtight container or freezer bag in the refrigerator for up to 3 days or in the freezer for up to 6 months. I keep a dedicated “broth bag” in my freezer and add leftover bones and vegetable scraps to it over time.
Q3: My broth didn’t gel like bone broth. What did I do wrong?
A gelatinous, jiggly broth is a sign of high collagen content. Pork chop bones may not have as much collagen as joints or feet. If your broth doesn’t gel, don’t worry! It is still incredibly flavorful and nutritious. You did nothing wrong. For a more gelatinous broth next time, consider adding a pig’s foot or some pork neck bones to the pot.
Q4: What’s the difference between broth and stock?
Generally, stock is made primarily from bones and is simmered for a very long time, resulting in a rich, gelatinous liquid. Broth is often made with more meat and is simmered for a shorter time, resulting in a lighter liquid. This recipe creates a hybrid that could be called either, but its long simmer time pushes it closer to a rich, nutritious bone broth.
What’s your favorite way to use homemade broth? Share your ideas and inspiration in the comments below!